The CAN-TRBO team is happy to host a publicly available MMDVM to allow access to our system. If you would like to connect your MMDVM repeater to our network, please contact us (these settings will work for testing, but please contact us if you intend to do a permanent connection).
| This guide assumes you have basic understanding of DMR principles, programming and have a properly configured device. The full set up for Pi-star, etc is not within the scope of this document. If you need help, ask! As with every DMR device it is extremely important to ensure your DMR ID is set correctly to YOUR number. https://www.radioid.net/ Never operate two or more hotspots at the same time on the same frequency or on a repeater frequency, this can create a serious audio looping issue and render the server useless. Be sure to put Local 9 in your Rx group for all channels in your hotspot zone for oS annunciation. Please do not use talkgroups that are not listed in the table below. If you do, they will not pass through the c-Bridge, nor will there be any hold-off timer control. This activity adversely affects the other users. |
Openspot Connection Instructions
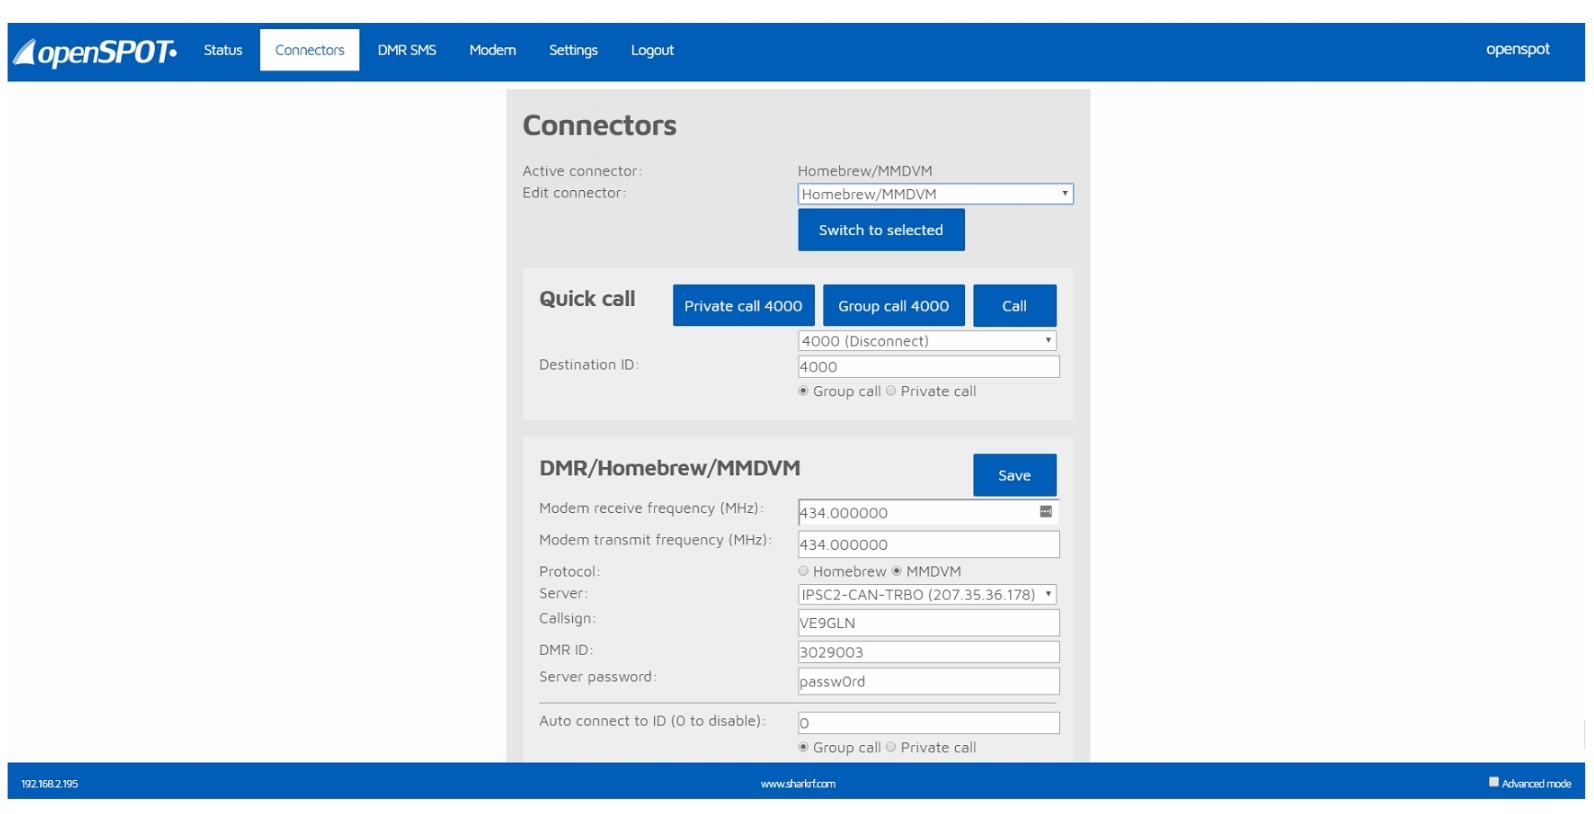
1- Click on Connectors Tab
2- Switch active connector to Homebrew/MMDVM
3- Protocol select MMDVM
4- Server select IPSC2-CAN-TRBO (44.31.14.13)
5- Ensure your callsign, ID, location are entered correctly and that you are using a frequency that will not interfere with other amateur radio operations.
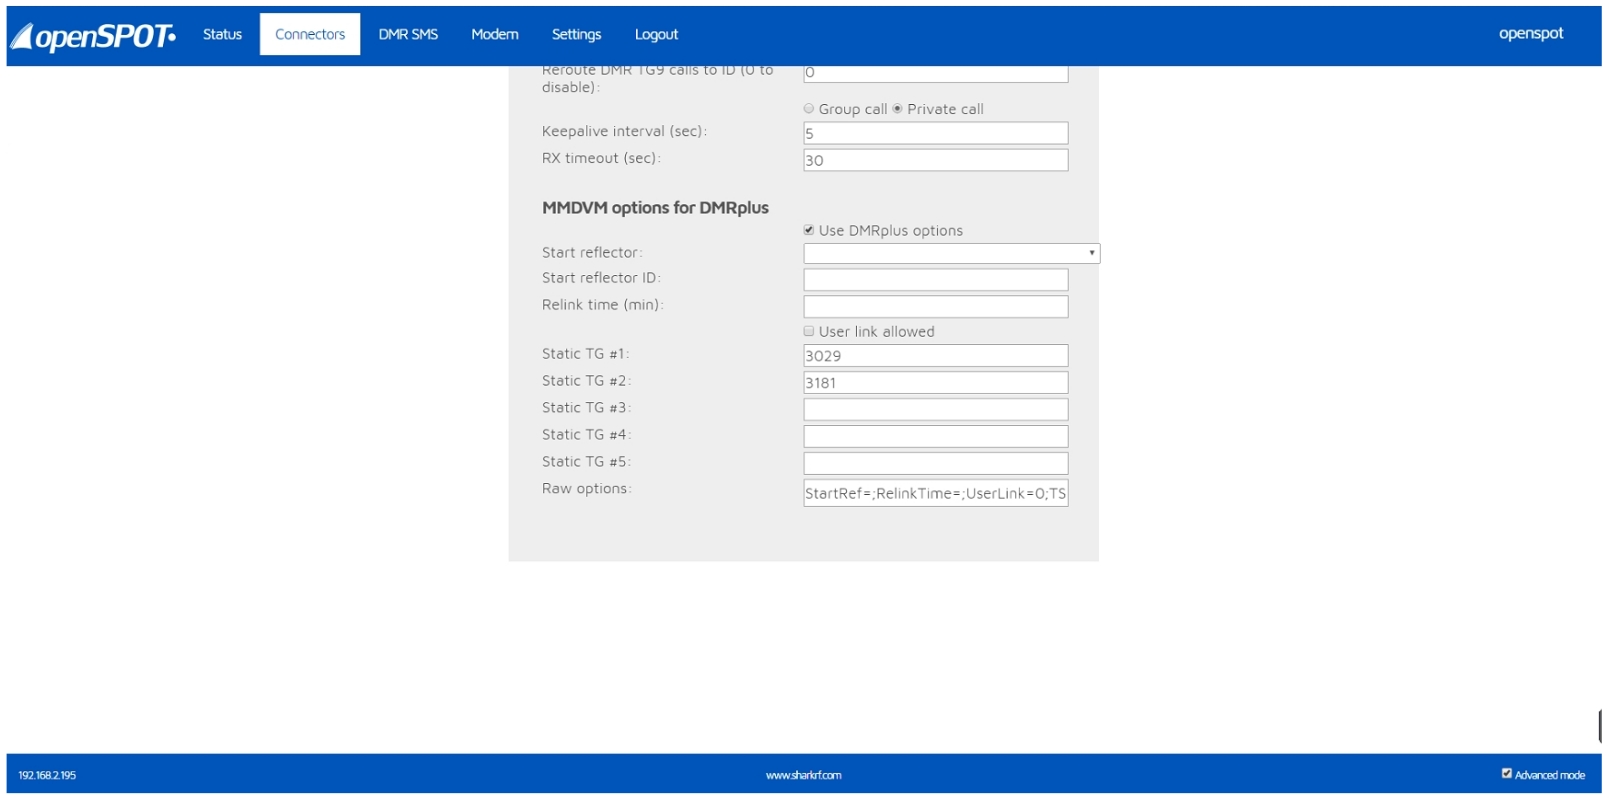
6 -Near the bottom of the connectors page you will see MMDVM Options for DMRPlus, select the Use DMRPlus Options check box.
7- You can enter up to 5 static talkgroups in the appropriate boxes
8- By default, any talkgroup you enter is assigned to Time Slot 1, so for talkgroups using Time Slot 2, like any of the Canadian Provincial talkgroups, click the Advanced Mode check box at the bottom right corner of the page, and under Raw Options you will see your talkgroup entries.
9- StartRef=;RelinkTime=;UserLink=0;TS1_1=3029;TS1_2=3181; notice how by default the talkgroups you entered above are showing as TS1, simply change TS1to TS2 (TS2_1=3029) and scroll up the page and hit the Save button. If you don’t enter any talkgroups, you won't hear any traffic unless you PTT and activate the dynamic timer, however as soon as that short timer disappears, audio won’t be routed to your device, so it is extremely important to ensure you specify your talkgroups.
Pi-Star Connection Settings
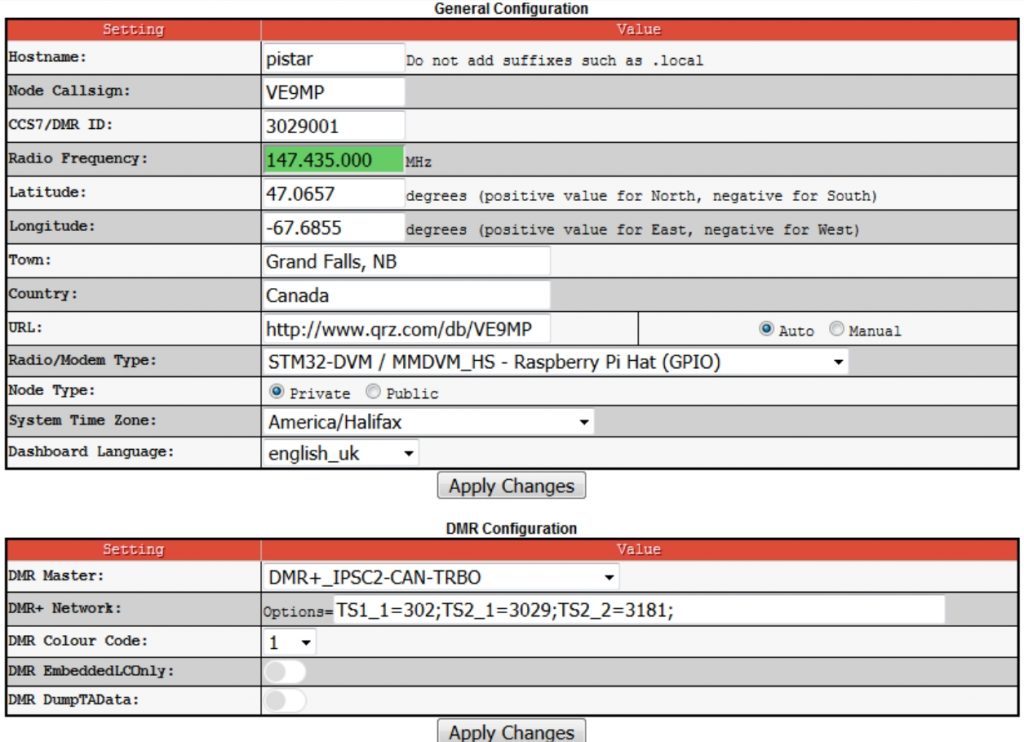
1- From your Pi-Star's home page, click on Configuration near the top right corner.
2- Ensure your general configuration settings are set correctly(Callsign, Frequency,Radio ID, &Location)
3- Select DMR+_IPSC2-CAN-TRBO as your DMR Master.
4-Under DMR+ Network Options, use the options line to enter what talkgroups you want to your hotspot. You can copy and paste and modify our example as a starting point. TS1_1=3;TS1_2=302;TS2_1=3023;TS2_2=3029;
If you don’t enter any talkgroups, you won’t hear any traffic unless you PTT and activate the dynamic timer, however as soon as that short timer disappears, audio won’t be routed to your device, so it is extremely important to ensure you specify your talkgroups.
5-Click Apply Changes.
Verifying Operation
1- On the internet, navigate to http://ipsc2.can-trbo.ca
2- Check that your device is connected in the Link Status screen, with the proper callsign, location, radio ID, and talkgroups in the appropriate time slot column.
3- PTT on your radio and your callsign should show active and green indicatingit is receiving source audio from your hotspot as in the example in Figure 1.